Starting with the ARI ROS simulator
Did you know that it’s possible to practice programming with wiki ROS without having your own robot?
PAL Robotics’ latest addition, ARI, has its own free wiki ROS (Robot Operating System) simulator that you can install and get started using anytime and anywhere.
In 2019, PAL Robotics introduced a new humanoid social robot – ARI. This robot combines Service Robotics and Artificial Intelligence in one single platform, which makes ARI the ideal robot to practice your ROS skills on. ARI is able to perform a wide range of multimodal expressive gestures and behaviours, and is suitable for research in Human-Robot-Interaction, perception, cognition, navigation, and localization.
The Robot Operating System (ROS) is a flexible framework for writing robot software. The system offers a collection of tools, libraries, and conventions that aim to simplify the task of creating complex and robust robot behavior across a wide variety of robotic platforms.
This free ARI wiki ROS simulator covers five different tutorials:
- Installation
- Control
- Autonomous navigation
- MoveIt!
- OpenCV
In this blog we will cover the first part of the five tutorials: how to install the ARI wiki ROS simulator in your computer and how to get started, going step by step.
Step 1: Installing Ubuntu with ROS
The first step to start programming is to install the latest Ubuntu version 18.04.2 LTS. Use this specific ISO to install Ubuntu OS on your computer and from here onwards you are ready to start setting-up to install the ROS package.
In order to install the required ROS packages for running ARI’s simulation, first it is necessary to include packages.ros.org in the debian sources:
sudo sh -c 'echo "deb http://packages.ros.org/ros/ubuntu $(lsb_release -sc) main" > /etc/apt/sources.list.d/ros-latest.list'
Now the set up requires the keys to access the debian sources:
sudo apt-key adv --keyserver hkp://ha.pool.sks-keyservers.net --recv-key 421C365BD9FF1F717815A3895523BAEEB01FA116
In the event of getting a gpg: keyserver timed out error, try the following:
sudo apt-key adv --keyserver hkp://ha.pool.sks-keyservers.net:80 --recv-key 421C365BD9FF1F717815A3895523BAEEB01FA116
Now let’s move on to the actual installation of the ROS package, the steps are as follows:
To install the ROS packages, use the following command:
sudo apt-get updatesudo apt-get install git python-rosinstall ros-melodic-desktop-full python-catkin-tools ros-melodic-joint-state-controller ros-melodic-twist-mux ros-melodic-ompl ros-melodic-controller-manager ros-melodic-moveit-core ros-melodic-moveit-ros-perception ros-melodic-moveit-ros-move-group ros-melodic-moveit-kinematics ros-melodic-moveit-ros-planning-interface ros-melodic-moveit-simple-controller-manager ros-melodic-moveit-planners-ompl ros-melodic-joy ros-melodic-joy-teleop ros-melodic-teleop-tools ros-melodic-control-toolbox ros-melodic-sound-play ros-melodic-navigation ros-melodic-depthimage-to-laserscan ros-melodic-moveit-commander -y
And lastly, append the following command to ~/.bashrc to allow any console to use the catkin commands:
source /opt/ros/melodic/setup.bash
Step 2: Install the ARI simulator
The second and final step to follow to have ARI wiki ROS simulator accessible on your computer is to start with source-based installation:
At this point source-based installation is provided. First of all, open a terminal and create an empty workspace:
mkdir ~/ari_public_ws
cd ~/ari_public_ws
Download the file ari_public-melodic.rosinstall. Copy the rosinstall file in ~/ari_public_ws. Then run the following command in order to clone all the required repositories within the workspace:
rosinstall src /opt/ros/melodic ari_public-melodic.rosinstall
Set up rosdep:
sudo rosdep init
rosdep update
Then you may run the following command to make sure that all dependencies referenced in the workspace are installed:
rosdep install --from-paths src --ignore-src --rosdistro melodic --skip-keys="opencv2 opencv2-nonfree pal_laser_filters speed_limit_node sensor_to_cloud hokuyo_node libdw-dev python-graphitesend-pip python-statsd pal_filters pal_vo_server pal_usb_utils pal_pcl pal_pcl_points_throttle_and_filter pal_karto pal_local_joint_control camera_calibration_files pal_startup_msgs pal-orbbec-openni2 dummy_actuators_manager pal_local_planner gravity_compensation_controller current_limit_controller dynamic_footprint dynamixel_cpp tf_lookup opencv3 librealsense2-dev librealsense2-dkms hey5_transmissions" -y
Then, you can proceed with building the workspace:
source /opt/ros/melodic/setup.bash
catkin build -DCATKIN_ENABLE_TESTING=0
Once you have compiled all packages and sourced the environment (source devel/setup.bash) you’re almost ready to go.
Testing the ARI simulator
The last thing left to do in order to get started using your ARI wiki ROS simulator is to test it out, and here’s how to do that:
First of all open a console and source the workspace:
source ./devel/setup.bash
To launch ARI, execute:
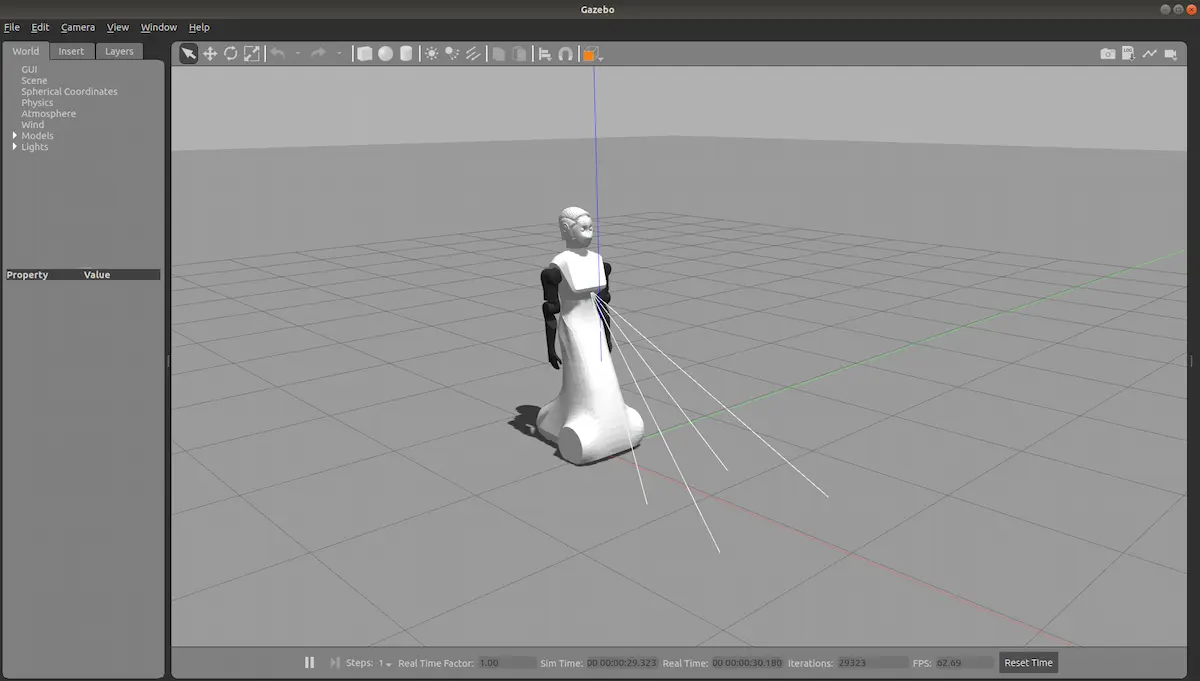
roslaunch ari_gazebo ari_gazebo.launch public_sim:=true
If you managed to launch the simulation it means the installation has been successfully installed. If you have rendering problems you should update your graphics driver.
Now you are ready to start programming and commanding our social robot ARI from your own computer without needing to have the actual robot. As well as this tutorial on how to easily install this free wiki ROS simulator, stay tuned for further tutorial blogs! You can also find this tutorial on how to install the ARI simulator by visiting the wiki ROS website.
Read more about the initial launch of the ARI wiki ROS simulator in our article introducing the ROS simulator for ARI.
We would love to see you trying out our ARI simulator; let us know more about your experiences by tagging us or using the hashtag #PALRobotics on Twitter, Facebook, LinkedIn or Instagram and we will share your work with other robotics enthusiasts.
Would you like to learn more about our social robot ARI? Make sure you visit our website. If you have any questions don’t hesitate to visit our contact page to communicate with our team to ask more about how to use ARI, and ARI’s capabilities.
If you find robotics as interesting as we do, then visit our blog homepage on robots and technology!

